Sunday, December 29, 2013

My First Time at the Benefit Brow Bar

Hello everyone!

How are you? Have you been enjoying the holidays?  I know I have - except for this terrible cold I have had for the past few days.  I've barely been able to eat anything because my throat hurts so much!

However, nothing could keep me from making my annual post-Christmas shopping trip to Gurnee Mills in Gurnee, Illinois with my mom yesterday.

After having our usual lunch at the Rainforest Cafe (I had a delicious portabella wrap), mom and I wandered over to Macy's.  When I enter Macy's, I do not stop and do not pass go until I reach the make up counters.

My first and only stop was the Benefit counter.

I knew that I wanted to start building up my Benefit collection - since I am already in love with their It's Potent eye cream.  It is no surprise that Benefit has great products.  Everything from their skincare to blushes to mascaras are raved about in the beauty world.  So can you really go wrong when purchasing from Benefit? I have yet to find out.


While perusing the shelves of the Benefit counter - I found this amazing box set of skincare samples!!!!
I was drawn to this box because it contained my beloved It's Potent - and a bunch of other products from their skincare line. The best part - it only costs $24 and I get to try it all!!!

Box Includes:
Foamingly Clean Facial Wash
Refined Facial Polish
Moisture Prep Toning Lotion
Triple Performing Facial Emulsion 
Total Moisture Facial Cream
It's Potent! Eye Cream

So as I was starting to head towards the cash register, the nice man at the counter told me that they were having a promotion where if you buy $50 worth of products - you can get your brows done for free. So I though "why not?!"


To meet the $50 mark I added on the Stay Don't Stray eye primer.  I've been on the look out for a new eye primer for sometime.  I picked up this in the color light/medium.  Hopefully this helps tame my oily eyelids.

Then it was time to get my brows done.  Believe it or not, I had never had my brows waxed before.  I am a tweezer girl - but I will say that I loved my experience!  I will be getting my brows waxed on a more regular basis.  The woman who did my eye brows was nice - she remembered my name and asked questions about what I like beauty-wise.  I felt taken well taken care of.  My brows turned out fabulously - and she even touched up my make up for free!  One of my favorite parts of the experience was that she never tried to sell me any of the products.  Often I am overwhelmed by the pushy sales people at make up counters.  I would highly recommend the brow bar - regularly costing $23.


Have any of you visited the brow bar? How was your experience?


Thanks for reading!

With love,

Traci J

Monday, December 23, 2013

Christmas Outfit + Manicure Monday


Hello and happy Monday!  This past Saturday we had my Mom's side of the family over for a Christmas celebration - and I had been planning my outfit for weeks (as any good beauty blogger would do).  So, with only 2 days until Christmas - YAY- here is my Christmas outfit (and a Manicure Monday squeezed in at the end)!


I think the combination of the long sweater, liquid leggings, and gold necklace is super festive and cozy - while still incorporating the right amount of holiday glam.  I found the sweater a few weeks ago at Marshalls, and I am obsessed with the way it fits tightly on my arms and flows out at the bottom.  Plus, it has the right amount of a hi-lo cut so it covers my behind in my leggings :P  

I first bought a pair of shiny floral print black leggings at Marshalls - and swore up and down that I didn't need to try them on because they were spandex and they would fit... Of course I got home put them on and they were SUPER baggy.  So feeling embarrassed and discouraged, I set off to find the perfect pair of liquid leggings.  I found them rather quickly at Rue 21 ( I don't shop here often becuase I usually don't find many items that are worth purchasing - however these leggings were only $5)!!!  This time I went into the dressing room and tried them on - they were a perfect fit.


The behind is covered! 


First - check out the cute Christmas cat in his little red collar. How cute!  

For shoes - I have on my black and brown boots from Boston Store.  I purchased these for only $20 on Black Friday - so worth it.  They are very comfortable and go with almost anything.  

For make up I did a black/grey/gold smokey eye with a cat eye liner and big lashes. I used the same plum blush as in my Christmasy baking look, a plum shade with a little bit of shimmer.  On my lips I tried out a new shade from NYX - Violet Ray.  The camera doesn't do it justice - it is a deep violet shade with enough of a red undertone to make it wearable.  This is the darkest shade I own - and I am loving it.  Playing around with lipsticks is one of my favorite things to do.

As for my hair I just curled the bottom layer randomly using my 1 1/2 inch barrel iron and used some sea salt spray to add some texture and volume - I was pretty satisfied with the overall look.


Manicure Monday!


For my Christmas party manicure I wanted something that just screamed "CHRISTMAS!!!"  I think that the green color paired with a colorful glittery polish looks just like a Christmas tree with colored lights.  It added the pop of color that my outfit needed.

*I never mentioned my necklace - it is a few years old and from Forever 21.

I used my usual base coat by Essie, and then put on two coats of Wild Cactus by the Color Club.  This color came to me in a Birchbox a few months back, and I love it.  It is a true green - perfect for Christmas. The formula isn't streaky or thick, and it goes on perfectly with two coats.  

For the glitter or "the lights" on my Christmas tree inspired nails, I used one coat of a rainbow glitter polish by Cynthia Rowley.  I can't find the polish online anywhere - I purchased mine last year at TJMaxx.

Then - I topped it off with my current favorite top coat, which you can see here on my first ever Manicure Monday!

I hope you enjoyed my Christmas outfit and manicure.  If you have done a holiday look put a like in the comments - holiday season is still here and I need some more inspiration!

Merry Christmas - with love,

Traci J


Tuesday, December 17, 2013

A Christmasy Day + Make Up Look + Cookies | Part 2!!!

Why hello again Christmas Lovers!

After I did my make up today, I spent the whole day baking Christmas cookies with my mom!  We had a super fun time and I got even more into the Christmas spirit than I was already (if that is even possible).

One of my favorite Christmas cookies to make are palmiers.  Anne Burrell from the Food Network has a fantastic recipe that uses orange zest and they make the whole house smell like Christmas.

Here is how we made these AMAZING little cookies:


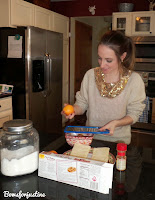
First we gathered all of our supplies: 2 sheets of puff pastry, 2 oranges, sugar, ground cinnamon, a small bowl, a grater or zester for the oranges, a cutting board or surface to roll the dough on, a rolling pin, 2 cookie sheets, a fork, and plastic wrap.


Set the sheets of puff pastry side by side and let thaw for about 30 minutes, unless you make your own - and in that case, good for you!


While the pastry is thawing, I measure out 2 cups of sugar, 4 teaspoons of cinnamon, and zest 2 small or medium oranges.  I then combined these in a small bowl with a fork.  The smell is HEAVENLY.


When the pastry is thawed, I spread out a quarter of the sugar mixture on my surface.  Then I unfold one sheet of the pastry and spread another quarter of the mixture on top.  


Using a rolling pin, I rolled the dough to about 1/8 of an inch thick.  Make sure to press down really hard to get the sugar to stick onto the dough.


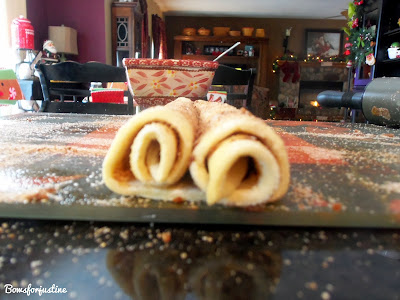
Then, rolling from the shorter sides (if there are any... I'm not a very good roller so by this time it has lost its original shape) roll until they meet in the middle.  This may take some practice, but it doesn't need to look SUPER pretty - it spreads out while cooking anyway.

Wrap the roll in plastic wrap and place it in the refrigerator for 30 minutes.  Here you can see that I did both sheets of pastry and placed them side by side to rest in the refrigerator.  Waiting for this to set is the hardest part, after your hands already smell all Christmasy and you are anticipating the deliciousness that will be coming out of the oven!!!!

Speaking of ovens... I preheated mine to 400 degrees.


After they chilled, I cut them into 1/4 inch slices and laid them onto a parchment lined baking sheet.  Like I said, appearance doesn't really matter - they will cook and caramelize and no one will care what they look like.


I then place the palmiers into a 400 degree oven.  I recommend only doing one pan at a time.  Last year, when I tried to place both baking sheets in the oven - the bottom one was really burned.  

This really is the best part of the whole process (besides eating them).  The entire house is filled with the smell of cinnamon and oranges.  Does anyone know if they make a palmier candle? I need it.


Let them cook for 11-12 minutes, remove from oven and turn them all over.  Then I cook them for 6 more minutes.  Look how brown and delicious they are already!


Yum!! This is what they look like when they first come out of the oven.  Don't they look all delicious and amazing?


I snapped a few pictures of the other cookies we made: rolo pretzels (which are not really cookies) and some delicious red velvet and white chocolate cookies!

What are your favorite cookies to make???

I hope you enjoyed part 2 of my Christmasy day (don't forget to check out Part 1), and I look forward to sharing more of my festive adventures with you.

With Love,

Traci J


A Christmasy Day + Make Up Look + Cookie Recipe

Hello Christmas Lovers!

Today was a fun day.  I got up and played around with my make up - and then spent the whole day making Christmas cookies with my mom (aside from a short break to go shovel the driveway - eew).  So, since I had such a wonderfully Christmas-filled and relaxing day (again, aside from the snow shoveling) you all get a 2 in 1 post today.  The first part is the make up look I wore today - with muted browns and a beautiful plum shade on the cheeks, and the second part is this yummy palmier cookie recipe.  Enjoy!

My idea was for this to be a 2 in 1 post - first my make up look for the day, and then rolling into my cookie baking extravaganza.  However, I realized that this post would end up being too ridiulously long if I added all my cookie bits to it.  So click here for PART 2 of this " 2 in 1" blog post!


Start with a clean face - then apply a generous amount of moisturizer.  I have been double moisturizing lately since the winter air is super drying and just really not nice to my skin. :(

For foundation I have just started using Outlast Stay Fabulous 3 in 1 by Covergirl.  I use the shade Classic Ivory - since I am quite pale.  Primer is optional with this foundation since it is a 3 in 1 - and I definitely feel comfortable going without!  However, in the summer when my skin is super oily and sweaty, I would probably opt for a primer underneath.  This foundation gives good coverage and is build-able for my troubled areas (aka the acne on my forehead at the moment).  My go to foundation applicator is the Expert Face Brush by Real Techniques - you can see me using it while staring at the camera like a weirdo in the picture on the right...


After blending my foundation, I use the Above & Beyond FULL Coverage Concelear by NYX.  I wear the shade Porcelain.  I have to be honest, this is not my favorite concealer.  I find it to be a little bit cakey on my face - and it doesn't do a great job at covering up my redness.  I am just trying to use it up before I purchase a new one.  Luckily, my foundation does such a good job - I don't need much. I also blend this out with the Real Techniques brush.


To set my foundation and concealer, I use the Shine Free Pressed Powder by Maybelline, in the shade Ivory. This powder is NOT cakey and doesn't settle into the dry skin on my face, which makes me super happy and in love with this powder.  I put it all over my face with the Total Face Brush by E.l.f.  

Once my powder is on - this is how my face looks ^^. Pretty nice, I think.


Next, I apply Color Tattoo by Maybelline in the shade Tough as Taupe (I just use my finger).  This is a nice matte shade that I find blends seamlessly onto my skin, it leans on the more grey side of taupe.  The Maybelline Color Tattoos are another one of those products that don't need a primer, but would benefit from one on a humid day or for a long wear application.


When I wear Tough as Taupe, I always cover it with the taupe shade from my Caviar & Bubble palette by NYX (this palette seems to be discontinued - I cannot find a link to it ANYWHERE - sad... I love this palette).  If you can't tell, it is the second shade on the top.  It almost exactly matches Tough as Taupe, and just makes blending in other colors a lot easier.  I also apply this allover my lid with my finger.


I then apply the dark brown shade from the same palette with this Defining Eye Brush by E.l.f.  I just put it in my crease and blend it a little with the same brush.  I then take a brush that is a little bit fluffier and better for blending, the Full Eye Shadow Brush by Ecotools.  I blend the eye shadow up and out until it makes a more natural look.


To highlight the inner corner of my eye and brow bone, I sweep on a little bit of the Mary-Lou Manizer Highlighter by theBalm.  This stuff is my all time favorite highlighter.  It is a gorgeous light champagne color and makes my eyes look awake and shimmery. This is another product that I apply using my fingers.


So far, my eyes look something like this.


For eyeliner, I line my upper inner rim with the Color Stay Pencil by Revlon in black, and I use the Color Stay Liquid Eyeliner in blackest black to lightly line my lash line.  My favorite drugstore mascara is The Rocket by Maybelline.  I think that it does a great job at making my eyelashes look full but not clumpy.  I use the waterproof version in very black.  I applied mascara on both my upper and lower lashes.


And here are my eyes. Yay!


For bronzer I opted for a shimmery powder by E.l.f.  This is the Healthy Glow Bronzing Powder, I have absolutely no idea what shade this is... the label has worn off.  For my cheeks I used a brand new blush that I picked up from Ulta yesterday! I love new blushes!!! The blush is Cheekers by Covergirl in the shade Deep Plum.  This is a pretty plum shade that I think is perfect for winter, and I  apply this with a generic blush brush.


For lips I chose a pretty pinkish/brown shade.  I also picked up this product yesterday, and it is every bit as good as everyone is saying it is! This lip gloss is the Butter Gloss by NYX, and the color is Tiramisu.  Really, it feels just like buttery goodness on your lips.  Plus, I think it smells like cake - so that's a plus.


Here are a few photos of the finished make up look.  Sorry that this didn't end up as a 2 in 1 post - but be sure to check out what I did AFTER I did my make up here!

I hope you enjoyed this make up tutorial - please let me know what you thought in the comments.  Also, throw out any concealer recommendations that you have!

With Love, 

Traci J


Monday, December 16, 2013

Manicure Monday | Hot Chocolate Colored Nails + I'm Featured!

Hello everyone!

Can you believe that there are only 9 days until Christmas!?!  It's ridiculous.  As someone who thoroughly enjoys basking in all that is the holidays... I'm a bit sad that the end is creeping up so quickly.


First, I want to start off by saying that I have arrived at my family's house for the holidays.  I love being here, my mom (Bluebird1959) always has the house so amazingly festive and smelling like Christmas. (If you didn't know already, today is her birthday so you should click the link above and visit her blog).  However, the nail polish remover selection in our household appears to be devastatingly slim...

I pulled a bottle of Cutex Non, Acetone Nail Polish Remover out from underneath my mom's sink in her bathroom.  I assumed it would do a fine job - WRONG.  It took me about 15 minutes of scrubbing at my nails and 10 cotton pads to get my nail polish off.  Usually, with the polish I had on my nails it would take about 5 minutes and 2-3 cotton pads... Yuck.

I just needed to vent about my nail polish struggle... Let's move on to the actual manicure.


To add a Christmas-y flair to my Manicure Monday, I decided to go for a hot chocolate color.
I started off with the same base as I did in last week's Manicure Monday.


After applying the base coat, I applied two coats of Very Structured by Essie.  As usual, I picked mine up at Ulta (however I couldn't find it on the Ulta website anymore, so I linked to where you can buy it on Amazon).


This color looks just like milk chocolate - and I know Essie has a shade called Hot Cocoa, but this to me looks more like true hot chocolate.  When you mix the whipped cream and marshmallows in it is less of a dark chocolate, and a lot more like the color Very Structured creates on my nails.

Lastly I finished up with my go to top coat.

Let me know what you think about my hot chocolate inspired manicure in the comments.

Oh, I almost forgot!  I am going to be featured in this Wednesday's Grow your Blog Link Up over at One Chocolate Box!

 Check out the blog and (if you have less than 500 subscribers) join this weeks link up!

Thanks for checking out this week's manicure, and enjoy the countdown to Christmas!

With Love,

Traci J